Thursday, December 26, 2013

Sticky Toffee Pudding


Everyone in my family is a huge fan of this Sticky Toffee Pudding dessert at Charlotte's Lane Cafe, so I thought I would attempt it as a dessert for Christmas dinner. It turned out and boy was it good. Super rich.

Here's what you'll need for the cake:

One 250gram package of pitted dates, chopped (about 2 cups)
1 tsp baking soda
1 cup boiling water
3/4 cup light brown sugar
2 eggs
6 Tbsp salted butter, softened
1 tsp vanilla
1 1/3 cup AP flour
1 tsp baking powder

Here's what you'll need for the caramel sauce:
1 1/4 cup light brown sugar
1/2 heavy cream
1/4 cup salted butter
1/2 tsp vanilla


In a large bowl, combine the chopped dates, baking soda, and boiling water. Let sit for approximately 30 minutes.

Preheat the oven to 350 degrees, then grease and lightly flour an 8-inch baking pan.

Add the brown sugar, eggs, butter, and vanilla to the date mixture and beat for 2 minutes until combined. Add the flour and baking powder, and beat on low for another minute. Scrap down the sides of the bowl and beat for another minute until all the ingredients are well combined.

Spread the batter evenly in the prepared baking pan and bake for 40 minutes or until an inserted toothpick comes out with just a few moist crumbs on it.

While the cake is baking, you can make the caramel sauce. In a small saucepan, bring sugar, cream, and butter to a boil over medium heat, stirring constantly. Continue to boil, stirring constantly for 3-5 minutes. Remove from heat and stir in the vanilla. Let cool to room temperature.

Set the pan on a wire rack and poke holes all over the top of the cake with a small knife and/or toothpick (I used both). Pour 1/2 cup of the caramel sauce over the cake. Let cool for 10 minutes.

To serve, cut the cake and serve with the remained caramel sauce and ice cream or whipped cream.

The remaining cake can be stored in an air tight container or covered with saran-wrap in the fridge or at room temperature for a few days.

Enjoy! :)


Tuesday, December 10, 2013

Salted Turtle Chocolates


These are the perfect holiday treat to have around the house and they're really fun to make. Also, dead easy!

Here's what you'll need:
Pecan halves
unwrapped soft caramels (store bought or homemade —I used store bought!)
Semi-sweet chocolate, melted
Sea salt for sprinkling

Preheat the oven to 325 degrees and line a baking sheet with parchment paper.


Place two pecan halves next to each other on a baking sheet and place a caramel on top. Repeat this step as many times as you want depending on how many turtles you want to make.


Place baking sheet in the preheated oven and bake for ~5 minutes or until the caramel has melted (be sure to keep an eye on them while baking —you don't want the caramel to burn!).


Allow to cool.

Melt the semi-sweet chocolate in the microwave, then either a) dip the bottom of the turtles into the melted chocolate or b) spoon a small amount of melted chocolate onto the parchment paper and place the turtles on top (I did b)).


Drizzle some of the remaining melted chocolate on top of the turtles and sprinkle with sea salt. Ta-da —all done!! How easy was that?!


Wednesday, December 4, 2013

Raspberry Thumbprint Cookies


After finishing my last written exam today, I was feeling in a festive mood, so I decided to make some Christmas-y cookies. These cookies are really simple to make and super cute to have on hand at Christmas time. I should mention that this recipe only makes approximately 15 cookies, so if you want more than that, I would suggest doubling the recipe below. 

Here's what you'll need:
1/2 cup salted butter
1/3 cup white granulated sugar
1/2 tsp vanilla extract
1 egg yolk
1 cup AP flour
~1/4 cup raspberry jam (or any other jam will work)


In a large bowl, cream butter and sugar until well blended, then add in the vanilla and egg yolk and beat the mixture until it is fluffy. 

Add in the flour and mix until it forms a crumble dough. It may not stick together perfectly, but it's okay; simply use your hands to shape the dough into a log that is roughly 10" in diameter. Roll up the dough in plastic wrap and refrigerate until firm (approximately 20 minutes). 

Remove the dough from the fridge and preheat the oven to 300 degrees F. Let the dough sit for 10 minutes, then unwrap the dough and slice into 1/2"-3/4" thick pieces (I only made small cookies, so if you want larger cookies, then make the slices wider). 


Roll the slices into balls and place them on a very lightly greased baking sheet. 


Using a 1/4 tsp spoon, press down each ball, making an indentation in the centre. Fill each indentation with 1/4 tsp raspberry jam. 


Pop in baking sheet in the oven and bake for about 20-25 minutes or until lightly browned/golden. 

Let cool for five minutes, then transfer to a wire rack for further cooling. 

Enjoy! :)


Sunday, December 1, 2013

Green Onion and Scallion Cheddar Scones


These were a nice savoury treat for brunch, which is a change from the sweetness of my typically baked goods. 


Here's what you'll need:
2 cups of AP Flour
1/2 tsp salt
1 Tbsp baking powder
1 Tbsp sugar
6 Tbsp cold salted butter, cut into pieces 
2 large eggs
1/3 cup sour cream
1 tsp mustard
1 cup sharp cheddar cheese
4 scallions, finely chopped
3 Tbsp green onion, finely chopped


Preheat the oven to 375 degrees F. Line a baking sheet with parchment paper (or liberally grease the baking sheet).

In a large bowl, mix together the flour, salt, sugar, and baking powder, then cut the butter into the dry ingredients and rub together with your fingers. 

Next, in a small bowl, mix together the eggs, sour cream, and mustard. 

Make a well in the centre of the dry ingredients, and add in the wet ingredients. Stir together. Now, add in the grated cheese, scallions, and green onion and stir together until just combined. This should be the consistency of cookie dough. 

Sprinkle flour over the counter. Pat the dough into a 6 x 9" rectangle, about 1" thick. Cut the rectangle into 6 smaller rectangles, and then cut each small rectangle into two triangles. Altogether, this should form 12 triangular scones. 

Place the scones on the prepared baking sheet and bake for 20-25 minutes, or until lightly browned and an inserted toothpick comes out dry. 

Spread with butter and enjoy!


Sunday, September 29, 2013

Cinnamon Raisin Swirl Bread


Dan's parents are coming to town and staying with us a couple of nights. When I was visiting them over Christmas in NFLD, they always had homemade cinnamon raisin bread on hand and it was the best treat. I always toasted it with peanut butter. Yum. Anyways, because I know they both enjoy cinnamon raisin bread, I thought I would return the favour and bake them some. Here's a recipe adapted slightly from the the kitchn. It makes two loaves. 

Here's what you'll need for the bread:
1 cup raisins
1 cup warm water
1 Tbsp active dry yeast
1 cup milk (I used 1% but any kind will work)
1/4 salted butter, melted
1/2 tsp salt
5 1/2 cups Bread Flour (AP Flour will also work)


Here's what you'll need for the filling:
1/2 cup granulated sugar
1 1/2 Tbsp cinnamon
1 egg

Put the raisins in a small bowl and cover them with hot water for 8-10 minutes. This functions to make the raisins soft and plump. Drain and set aside.

Put 1 cup of warm water in a large bowl and sprinkle yeast over top. Let sit for 5-10 minutes, then stir to dissolve the remaining yeast. Also, just a little tip here: If you want, you can use the water from soaking the raisins; it will add extra flavour in your loaves. This is what I did. 

Stir the milk, melted butter, and salt into the water and yeast mixture. Now, gradually add the 5 1/2 cups of flour. As I mentioned, you can use bread flour or AP flour; it really doesn't make a difference with this bread. 

Using dough hook, knead dough in a stand mixer on low speed for 8-10 minutes or alternatively if you're stand mixer is broken like mine, knead by hand for 8-10 minutes. Muscles. The dough should be smooth and slightly tacky. If you find it's too sticky, add some extra flour halfway through the kneading process. 

Toss the raisins with a few tablespoons of flour so absorb any moisture from the soaking. If using a stand mixer, gradually add them until they are evenly distributed. If kneading by hand, pat the dough into an oval shape on your countertop. Sprinkle half of the raisins on top of the oval and fold like a letter. Repeat this step once more. So, form oval, sprinkle remaining raisins, fold like a letter. Knead the dough for a few more minutes until the raisins are evenly distributed (this took about 4 minutes for me). 
Rub the inside of a large bowl with oil and place the ball of bread dough inside. Cover with a tea towel and let rise in a warm place until doubled. This will take about 1 hour. 
In the meantime, combine the sugar and cinnamon filling in a small bowl, and beat the egg in a separate small bowl. 
Divide the dough into two pieces, so that you can work with one piece at a time. Roll the dough out on the counter. It should be slightly less wide than your bread baking pan and as long as you can make it. The thinner the dough, the more layers of cinnamon deliciousness you'll end up with. Brush the entire surface of the dough with the egg wash, leaving about 2 inches at the top. Sprinkle half of the cinnamon sugar filling over the dough. Starting at the end closest to you, roll up the dough. When you get to the top, pinch the seam closed; also, pinch the seams on the side of the dough closed. Place the loaf seam side down in a greased bread pan. Repeat these steps with the other piece of dough.

Preheat the oven to 375 degrees F.
Cover the loaves with a tea towel and let them rise one more time, until they are slightly mounded over the top of the bread pan. This will take 30-40 minutes.  
Bake for 40-45 minutes or until golden brown. When you tap on the loaves, they should sound hollow. Remove the loaves from the bread pans and let cool completely on a wire rack before slicing. 

Enjoy with a nice slab of butter! :)


Thursday, September 26, 2013

Ginger Toffee Cookies


Here's another one of my favourite Fall recipes. These cookies are really easy to make and they always turn out good. Just a head up though —this recipe makes A LOT of them (~36 or more, depending on the size). 

Here's what you'll need:
1/2 cup granulated sugar
1/2 cup salted butter, softened
1/2 cup shortening

3/4 cup molasses
2 eggs

3 1/2 cup AP flour
1 tsp cinnamon
1 tsp ginger
1/2 cloves
3 tsp baking soda
2 tsp vanilla
1 cup toffee bits
3-4 Tbsp chopped crystallized ginger
*additional granulated sugar for coating


Preheat the oven to 350 degrees F and line a baking sheet with parchment paper.

Cream butter, shortening, and sugar. Add the molasses and eggs, and beat well. Now, add the AP flour, cinnamon, ginger, cloves, baking soda, and vanilla. Mix until combined. Finally, stir in the toffee bits and chopped crystallized ginger.

Refrigerate the dough for 1 hour or alternatively place the dough in the freezer for ~20 minutes. I always put my dough in the freezer for 20 minutes because I can't wait the full hour! The purpose of putting the dough in the fridge or freezer is so that the dough is less sticky and easier to for into balls.

Place some additional granulated sugar in a small bowl. Roll the dough in balls (~1.5 inches in diameter) and then roll balls in granulated sugar. Place balls on a prepared baking sheet. Bake for 10-12 minutes until cracked and golden.

After removing the cookies from the oven, tap the baking sheet on the stovetop once to cause cookies to fall a bit —this is what helps make the crackly top. Cool cookies on wire rack.

Enjoy :)


Wednesday, September 25, 2013

Pumpkin Donut Holes


Summer is over and Fall has officially begun. Yay for Fall. I love the crisp air, the coloured leaves, as well as all the flavours of fall —pumpkin, apple cider, squash, warm soups. Yummy.

It's my turn to host book club this month, so I decided to bake the girls some Fall treats. I chose pumpkin donut holes (aka. timbits). and some ginger cookies. Below is the recipe for the pumpkin donut holes —they're relatively easy and make for a fun and delicious Fall treat.


Here's what you'll need for the donut holes:


1 3/4 cup AP flour
2 tsp baking powder
1/2 tsp salt
3/4 tsp cinnamon
1/2 tsp nutmeg
3/4 tsp allspice
1/3 cup canola oil or melted butter
1/2 cup brown sugar
1 egg
1 tsp vanilla
3/4 cup canned pureed pumpkin
1/2 cup milk
Here's what you'll need for the coating:
4 Tbsp salted butter, melted
2/3 cup granulated sugar
2 Tbsp cinnamon

Preheat the oven to 350 degrees F. Grease a mini muffin tin or alternatively a normal size muffin tin. If you use a normal size muffin tin, it will simply result in larger donut holes (they will almost resemble a small muffin). 
In a large bowl, whisk together oil, brown sugar, egg, vanilla, pumpkin, and milk. Add the dry ingredients (AP flour, baking powder, salt, cinnamon, nutmeg, and allspice to the wet ingredients, and whisk until combined and smooth. 
Divide the batter evening among the muffin cups (this recipe makes 24 donut holes if using a mini muffin tray or 12 if using a regular muffin tray). Bake for 10-12 minutes or until a toothpick comes out clean. Again, if you're using the larger muffin tray, baking will take a few extra minutes.
While you're waiting for the donut holes to bake, melt the butter in a small bowl, and combine the granulated sugar and cinnamon in a separate bowl.
Once the donut holes are finished baking, let cool for 5 minutes. Once cooled, dip each donut hole in the melted butter, then in the cinnamon sugar to coat. 
Ta-da! Enjoy :)


Monday, August 5, 2013

French Bread


Happy Natal Day fellow Nova Scotians! After a nice long sleep, I was up early today and felt like baking. I decided to make some bread to have on hand for the week. This recipe is fairly straightforward and requires only a few basic ingredients. The loaf of bread came out really good, but please note that this recipe makes more of a baguette height bread, rather than a sandwich height bread.

Here's what you'll need (makes one loaf):

2 1/2 cup AP flour
2 3/4 tsp active dry yeast
1 tsp salt
1 cup warm water
1 egg white


In a large bowl, combine 1 cup of flour, yeast, and salt, and give them a little stir to combine. Add the warm water (make sure the water is warm, not too hot because it will kill the yeast and your dough will not rise) and stir until combine. Then, add the remaining flour, stir for a couple of minutes, then use your hands (or a mixer with a dough hook, if you have it) to mix until combined into a rough ball.

On a lightly floured surface, knead the dough for 8-10 minutes or until the dough is smooth and elastic. Again, if you have a mixer with a dough hook attachment, you can use it instead of your hands. Unfortunately, my kitchen aid mixer is broken :(, so I used my hands. On the plus side, it's a good forearm workout haha

Anyways, continuing on with the directions, once you have finished kneading the dough, form a ball and place it in a greased bowl, turning a couple of times to cover the dough in oil. Cover the bowl with a damp tea towel and let rise in a warm place until doubled in size (~45 minutes). Quick tip: Boil a medium size pot of water, and place it in the bottom of the oven along with your bowl containing the dough on a rack above (oven is turned off). Close the oven door. The steam from the boiling pot of water really helps the dough rise. Seriously, it's a wonderful trick, especially if you have trouble getting your dough to rise.

Once your dough has doubled in size, punch it down, place it on a lightly floured surface, cover with a damp tea towel, and let rise for 10 minutes.

Now, roll the dough into a large rectangle, and roll it up from a long side. Taper the ends, and moisten the edge and ends with water to help seal. For further instructions, see this helpful website: How to make the perfect french loaf

Grease a baking sheet, and place the loaf with the seam side facing down. Beat the egg white and brush it onto the loaf. Cover with a damp tea towel, and let rise until doubled (~45 minutes). Again, here you can use the boiling pot of water trick to help with rising.

Once the bread has doubled, use a sharp knife to make 4 diagonal cuts (~1/4 inch deep) on the top of the loaf. In a preheated oven (375 degrees F), bake the loaf for 20 minutes. After 20 minutes, remove the loaf from the oven and brush again with egg white. Bake for another 15 to 20 minutes. If you find the top of your loaf is browning, you can place a piece of tin foil on top to prevent further browning.

Once your bread is done, let cool on a wire rack. Slice and enjoy with butter and cheese :)


We also enjoyed some iced coffee after our morning workout —lots of ice, coffee, almond milk, and cinnamon = delish!


Saturday, August 3, 2013

Greek Quinoa Salad


We're off to our friends cottage in Arisaig for the night. We plan to have a yummy BBQ, some drinks, play cards, and relax. We're really looking forward to get out of the city for a night. 

My contribution to the BBQ is a greek quinoa salad. I didn't copy down the exact measurements when I was making the salad, so you can make adjustments to the recipe below to suit your taste.

Here's what you'll need for the salad:

1 cup cooked quinoa
4-5 cups arugula
1 cucumber, chopped
1 red bell pepper, chopped
1/2 large red onion, chopped
1 cup grape tomatoes, chopped
1 cup feta cheese, chopped
1/2 cup kalamata olives, pitted

Here's what you'll need for the dressing:
1/3 cup olive oil
1/2 cup red wine vinegar
1 tsp oregano
1/4 tsp garlic power (or 2 minced garlic cloves)
salt and pepper to taste

Place the arugula, quinoa (make sure it's cooled or it will wilt the arugula), and chopped veggies in a large bowl. Add the feta cheese and kalamata olives on top.


To make the dressing, place all of the ingredients in a mason jar, put the lid on top, and shake until combined. If you don't have a mason jar on hand, simply used a bowl and whisk the ingredients together until combined.


A few minutes before you're ready to serve the salad, give the dressing another shake, and add on top of the salad. Stir until combined.

Enjoy :)


Friday, August 2, 2013

Baked Onion Rings


Today, my parents came to visit and they brought some little red potatoes and onions from their garden.

While they were visiting, we got talking about the onion ring appetizer at the Works, so after they left I decided to try to make onion rings using the onions from my parent's garden.

Here's what you'll need (the measurements don't really matter because it will be based on how many onion rings you want to make):

white or yellow onions
AP flour
egg, beaten
seasoned or plain panko bread crumbs
olive oil

Preheat the oven to 425 degrees F. Lightly grease a baking sheet or alternatively, line it with tin foil.

Peel the onions and slice off the two ends. Now, slice them into rings —they can be as narrow or thick as you want.

Place the AP flour, egg (beaten), and panko breadcrumbs into three separate bowls.

One at a time, take each onion ring, and dip into the AP flour, followed by the egg, then the panko breadcrumbs (in that particular order —flour, egg, breadcrumbs), and place on prepared baking sheet. Repeat with the remaining onion rings.

Once all of the onion rings are on the prepared baking sheet, drizzle a little bit of olive oil over them.

Bake for 10 minutes, flip onion rings, and bake for another 10 minutes, or until they are crispy.

YUM!

Wednesday, July 31, 2013

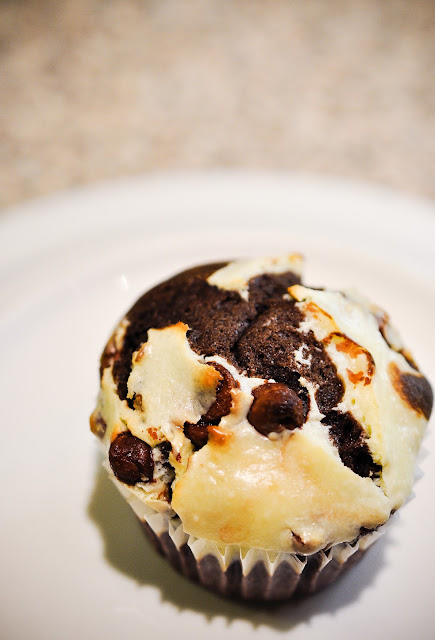
Brown Bottom Cheesecake Cupcakes


This rarely happens, but earlier this week, Dan made a request for these cupcakes/muffins that his friend, Logan's mom used to make for them in university.

These cupcakes/muffins (not sure what to call them) turned out delicious. I love them. The only thing I would change next time is to make extra cheesecake filling because it's extra tasty! I would recommend doing one and a half of the cheesecake top recipe below.

Here's what you'll need for the chocolate bottoms:

1 1/2 cup AP flour
1 tsp baking soda
5 Tbsp unsweetened cocoa powder
1/2 tsp salt
1 cup white sugar
1/3 salted butter, melted
1 cup water
1 tbsp vinegar
1tsp vanilla

Here's what you'll need for the cheesecake tops:

1 8 oz package cream cheese
1 egg
1/3 white sugar
1/8 tsp salt
1 heaping cup of milk chocolate chips

Preheat the oven to 350 degrees F, and line two muffin pans with paper liners.


In a large bowl, combine flour, baking soda, cocoa powder, and salt. Make a well in the middle. Add melted butter, 1 cup white sugar, water, vinegar, and vanilla. Using a large wooden spoon or a whisk, stir together until combined. Set mixture aside.


In another large bowl, beat together the cream cheese (make sure it is softened, but do not melt it in the microwave), egg, 1/3 white sugar, and salt. Once the mixture is smooth, stir in the milk chocolate chips.

Fill the muffin cups 1/2 full with the chocolate bottom batter, then top with a heaping spoonful of the cheesecake toping.


Bake for 20-25 minutes.

Enjoy with a glass of cold milk :)


Tuesday, July 2, 2013

Grapefruit Loaf


So, this loaf is very similar to the Lemon Blueberry Loaf that I made last week, but a bit more tart, especially after the loaf has set for a couple of days and absorbed the flavours. I think it's absolutely delicious and if you like "citrusy" desserts, you will love this grapefruit loaf. I got the recipe from my friend, Rachel at The Youngest Dragon. Rachel is an amazing baker AND cook, so I definitely recommend heading over to check out her blog.


Here's what you'll need for the bread:

2 cup AP flour
2 tsp baking powder
1 tsp salt
1 2/3 cup granulated sugar
2 eggs
1 cup whole milk (other milk will work if you don't have whole)
3/4 vegetable oil or melted butter
2 Tbsp grapefruit zest
1 tsp vanilla

Here's what you'll need for the grapefruit syrup:
1 cup grapefruit juice
2/3 cup granulated sugar

Here's what you'll need for the grapefruit glaze:
3 tsp grapefruit juice
1 cup confectioner's sugar (more if you want a thicker glaze)


Preheat the oven to 350 degree F and grease the bottom and sides of a 9 x 5 " loaf pan.

In a small bowl, whisk together the flour, baking powder, and salt.

In a large bowl, whisk together sugar and eggs. Then, in the following order, add the milk, oil, grapefruit zest, and vanilla, making sure each addition is fully incorporated before adding the next ingredient.

Slowly add the dry ingredients to the wet ingredients.

Pour the batter into the prepared loaf pan and bake for 55-60 minutes, or until you insert a toothpick and it comes out clean (or nearly clean).

While the loaf is in its final few minutes of baking, combine the grapefruit juice and sugar in a saucepan over medium heat and stir until the sugar has dissolved. Cook for another 2-3 minutes on low. Remove from heat and set aside. Note: As with the lemon blueberry loaf, you can also do the grapefruit syrup in the microwave; just be sure to stir the mixture every 30-45 seconds.

As soon as the loaf is finished baking, use a skewer or toothpick to poke holes in the loaf. Pour the grapefruit syrup all over the bread. Again, as with the lemon blueberry loaf, this loaf will likely appear to be drenched in syrup; however, don't worry because it will soak into the bread as it cools.

Once the bread has started to cool (~ 45-60 minutes after coming out of the oven), run a knife along the sides of the loaf pan to loosen the bread before turning it upside down and placing it on a wire rack to finish cooling.

To make the grapefruit glaze, simply combine 3 tsp of grapefruit juice and 1 cup of confectioner's sugar in a bowl. If you like a thicker glaze, you may need to add more confectioner's sugar; just play around with it until you get it at your preferred consistency. Spread the glaze over the top of the loaf and let harden before serving.

Enjoy :)