Thursday, December 20, 2012

Peanut Butter Balls


These are my all-time favourite. I make sure to bake them every Christmas.


Here's what you'll need:

5 cups confectioners sugar
1 cup salted butter
1 1/2 cup smooth peanut butter
16 ounces of 70% bittersweet chocolate, coarsely chopped


In a large mixing bowl, beat the confectioners sugar, butter, and peanut butter until well combined. The dough will probably have a crumbly texture to it; this is okay. Using your hands, form balls that are approximately 1" in diameter (you can make them larger if you want). Place peanut butter balls onto a baking sheet lined with parchment paper.

For the chocolate coating, melt the chocolate in the microwave, stir every 45 seconds.

Using a toothpick, dip the peanut butter balls into the melted chocolate coating. Place the chocolate coated peanut butter balls back on the baking sheet lined with parchment paper. Let the chocolate set by  placing the peanut butter balls in the fridge for 2 hours. After the chocolate has set, store the peanut butter balls in an airtight container in the fridge.


Peppermint Patties


Okay... so these were not easy to make but they were worth it. And, I did learn a couple of tricks along the way to make them a bit easier to make next time:

1) Double the recipe. If you're going to put in the effort to make peppermint patties, make it worthwhile.

2) Sprinkle extra confectioners sugar on the dough before freezing. This makes cutting the individual patties way easier.

3) Don't roll the dough out too thin. I made two batches. The first batch, I rolled out the dough quite thin, whereas the second batch, I rolled out the dough so it was still quite thick. I would say somewhere around 1/3 inch thick produces the best results.


Here's what you'll need:

2 1/4 cup confectioners sugar
1 1/2 tbsp light corn syrup
1 1/2 tbsp water
1/2 tsp pure peppermint extract
1 tbsp shortening
a pinch of salt
1/4 to 1/2 cup confectioners sugar for kneading and rolling
12 ounces of 70% bittersweet chocolate, coarsely chopped


Beat the 2 1/4 cups of confectioners sugar, light corn syrup, water, peppermint extract, shortening, and a pinch of salt, on medium speed until combined.

Dust the counter with 1/4 to 1/2 cup confectioners sugar and knead the dough until it is smooth. I used extra confectioners sugar on my hands while kneading. Once the dough is smooth, roll out the dough until it is about 1/3 inch thick. Sprinkle extra confectioners sugar on both sides and place in between two sheets of parchment paper on a baking sheet. Freeze for 15-20 minutes

Remove the dough from the freezer. Sprinkle the top of the dough with confectioners sugar; flip; and sprinkle the other side of the dough with confectioners sugar.

Now, you need to find a small round cookie cutter and cut as many round peppermint patties as possible. Place each peppermint patty on a baking sheet lined with parchment paper. Place the baking sheet with the peppermint patties in the freezer for another 15-20 minutes. Meanwhile, gather the scraps of dough, re-roll and freeze, then cut into more peppermint patties and freeze them.

To make the chocolate coating, melt the chocolate in the microwave, stopping to stir every 45 seconds.

To cover the peppermint patties with the chocolate coating, you need to balance each peppermint patty on a fork, then put it into the bowl of melted chocolate, letting the excess drip off and scraping the back of the fork against the bowl if necessary, then return the peppermint patty to the baking sheet lined with parchment paper. Another technique is to simply put each patty into the bowl of chocolate and pick it out by balancing it on a fork. This worked the best for me and was probably quicker. Whichever technique you choose, repeat until all of the peppermint patties are covered with chocolate.

Let the peppermint patties stand in the fridge until the chocolate is set. I waited about 2 hours. Store peppermint patties in an airtight container in the fridge. Enjoy!


Monday, December 10, 2012

Chocolate Cake with Colourful Whipped Vanilla Frosting


Here's what you'll need for the Chocolate Cake:

2 cups sugar
1 3/4 cups AP flour
3/4 cup unsweetened cocoa powder
2 tsp baking soda
2 tsp baking powder
1 tsp kosher salt
2 eggs
1 cup buttermilk (or 1 cup of milk and 1 tbsp white vinegar)
1 cup strong black coffee
1/2 cup melted butter or vegetable oil
2 tsp vanilla


Here's what you'll need for the Whipped Vanilla Frosting:

3 sticks + 2 tbsp salted butter, softened and cut into cubes
3 1/2 cups confectioners' sugar
3 tbsp milk
1 tbsp vanilla
a pinch of salt


Preheat the oven to 350 degrees F. Grease and flour two 9-inch baking pans.

In a large bowl, combine sugar, flour, cocoa, baking soda, baking powder, and salt. Mix on low until the dry ingredients are combined. Add the two eggs, buttermilk, coffee, melted butter or oil, and vanilla. Beat on medium speed for two minutes. Pour batter evenly into the two prepared pans (Note: The batter will be quite thin —but this is okay!).

Bake for 30-35 minutes or until a wooden toothpick comes out clean. I bake my two cakes for 35 minutes and they turned out nice and moist. Cool for 10 minutes, then remove the cakes from the pans and place on a wire rack until they are cooled completely.

While the cakes are cooling, you can whipped up the "Whipped Vanilla Frosting". In a medium bowl, mix butter on medium. The butter will become very pale and creamy. Add the confectioners' sugar, milk, vanilla, and salt, and mix on low for one minute, then on medium for 6 minutes. The frosting will be very light, creamy, fluffy, and delicious! Add food colouring if you want. I did a pastel rainbow frosting. Basically, I divided my frosting into two small bowls and made one a light turquoise frosting and the other a dark turquoise frosting. Here's a link to the tutorial I followed on Sweetapolita.

To assemble the cake, place one round cake on a cutting board. Place some frosting on top, spreading evenly with a spatula. Next, place the second round cake on top and frosting the top and sides —again spreading evenly. Add sprinkles or any other decorations that you desire! Enjoy :)


Friday, November 23, 2012

White Chocolate and Butterscotch Chip Cookies


These cookies are soft, chewy, and delicious. They're a bit unique where they incorporate both white chocolate chips and butterscotch chips. Also, the almond extract is key in these cookies —it makes them extra tasty.

Here's what you'll need:

1 cup white sugar
1 cup brown sugar
1/2 butter (softened)
1/2 cup vegetable oil or melted butter (I used 1/2 cup melted butter instead of vegetable oil)
2 eggs
1 tsp salt
1 tsp baking soda
1 tsp baking powder
1 tsp vanilla
1 tsp almond extract
3 cup AP flour
1 cup white chocolate chips
1 cup butterscotch chips

Preheat the oven to 350 degrees F and line a baking sheet with parchment paper. 

In a large mixing bowl, cream together sugars, butter, and oil. Add in the eggs and beat until fluffy (the mixture will become a pale colour). Add in all of the dry ingredients: salt, baking soda, baking powder, and AP flour, as well as the vanilla and almond extract. Beat for a couple of minutes until a soft dough has formed. Stir in the white chocolate and butterscotch chips. 

Roll dough into balls and place one inch apart on the prepared baking sheet. Bake for 7-8 minutes or until they begin to turn a very light golden brown. 

Wasn't that super easy? Enjoy! :)


Chocolate Fudge


I'm home for the week and my brothers absolutely love sweets. I tried to keep things simple so that I wouldn't have to spend a lot of time in the kitchen and I could just enjoy being home. 

This fudge is super easy and definitely satisfies a sweet tooth. Because I was in a "Christmas" mood, I topped half of the batch of fudge with chopped up peppermint patties (~ four patties coarsely chopped).

Here's what you'll need:

1 can of sweetened condensed milk (300 ml)
2 cup semi-sweet chocolate chips 
1 cup milk chocolate chips 
1/4 cup butter 
1 tsp of vanilla
4 peppermint patties (coarsely chopped)

First of all, you should line a 8 x 8" pan with aluminum foil. Lightly grease the foil. 

Now, in a medium saucepan, combine the condensed milk, chocolate chips, and butter. Cook over low heat until the mixture is melted and well combined. Be sure to stir constantly so that the mixture does not burn. 

Remove from heat and add in vanilla. 

Pour the mixture into your prepared pan. Smooth the top of your fudge and tap the pan on the counter a few times to get rid of any air bubbles. Add coarsely chopped peppermint patties or any toppings that you desire on top of fudge, gently pressing them down. 

Place in the refrigerator for a minimum of 2 hours. Once the fudge is hard and set, remove the foil from the pan and cut the fudge into pieces. Continue to store the fudge in the refrigerator. 

Sunday, November 18, 2012

Brown Sugar Shortbreads


This year I'm trying to get in the holiday spirit early and take full advantage of Christmas. It's the first time in 8 years that I'm going to be around to enjoy it!

This morning I felt like baking something "Christmas-y". Dan suggested Shortbread cookies, so I searched for a good recipe and settled on this super easy one from Midnight Baker. There were only THREE ingredients —all of which I had on hand.

What you'll need:
1 cup of salted butter, softened
1/2 golden brown sugar
2 1/4 cups AP flour

Preheat the oven to 300 degrees F.

To soften the butter, pop it in the microwave for 35 seconds, then beat the butter and brown sugar in a large bowl for ~3 minutes until it looks creamy. Gradually mix in the flour. I did this by adding 1/2 cup at a time and beating on low after each addition. After all of the flour was added, I continued to beat the mixture for 5 minutes until a soft ball of dough had formed.


Place the dough on a piece of parchment paper and roll into a 11 x 8 inch rectangle. The dough should be about 1/3" thick. Cut the dough into 1 x 2" pieces and prick each piece 2-3 times with a fork. Place the parchment paper onto a baking sheet.


Bake for 25 minutes or until the bottoms begin to get lightly brown. Cool on the baking sheet for 5 minutes, then transfer to a wire rack until completely cool. Enjoy :)


Wednesday, November 7, 2012

Raw Almond Butter


There is one thing that I love more than peanut butter and it is almond butter. Unfortunately, it's super expensive. I paid nearly 10 dollars for a tiny jar over the weekend!! I decided that it was time to start making my own, so I went out to the store and bought 4 cups of almonds (only 8 dollars).


What you'll need:

2 cups of almonds (or as many as you like)

Gradually add almonds to a food processor or blender. Process for 8-12 minutes, scrapping down the sides as you go. At first, the almonds will be a powder-like texture, but over time, they will turn into a smooth butter-like texture. Be patient. If you need to, add a little bit of oil to loosen the almonds up. I've also read a few blogs that suggest various add ins, such as honey, sea salt, cocoa powder, vanilla, etc. 

Two cups of almonds makes approximately one mason jar of almond butter. Enjoy!


Chewy Peanut Butter Cookies


After supper, Dan and I were craving something sweet and our left-over Halloween candy wasn't quite "hitting the spot", so I decided to whip up a batch of peanut butter cookies. I hadn't tried this recipe before, but I was very pleased with it. I adapted it from Everyday Home Cook. We only had natural peanut butter and I added in some milk chocolate chips :)


What you'll need:

1/2 cup butter, softened
1 cup crunchy natural peanut butter
3/4 cup white sugar
1/2 brown sugar
1 egg
1 tbsp milk
1 tsp vanilla
1 1/4 cup all-purpose flour
3/4 tsp baking soda
1/2 tsp baking powder
1/4 tsp salt
3/4 cup milk chocolate chips (optional)

Preheat the oven to 350 degrees F.

In a large bowl, beat together the butter and peanut butter, then add the two sugars and beat until fluffy. Add the egg, milk, vanilla, and mix together until the mixture is nice and smooth. Now, add the flour, baking soda, baking powder, and salt. Mix until everything is well blended. If you're using chocolate chips or any other add in, stir them in now. I did half of my cookies with chocolate chips and half without. Other great add-ins would be reese pieces candy or chopped reese pieces cups. Yum.

Form dough into ~1-inch balls, roll in white sugar, and place on an ungreased baking sheet. Bake for 10 minutes. The cookies may not look done, but they are; this is how you make sure they stay soft and chewy. Let the cookies cool on the baking sheet for a few minutes, then transfer to a wire rack.


Friday, November 2, 2012

Whole Wheat Bread


Here's a good recipe for an easy and delicious whole wheat bread (adapted slightly from The Frugal Girl).

What you'll need:

2 1/3 cup warm water
4 tbsp honey
4 tbsp butter, melted
9 tsp yeast
2 tsp salt
3 cups whole wheat flour
3 cups all-purpose flour, plus extra for kneading

Combine 1 cup whole wheat flour, 1 cup all-purpose flour, yeast, and salt in the bowl of a mixer. Add the warm water, honey, and melted butter. Mix on low speed until the ingredients are combined, then beat on medium speed for 3-5 minutes.

Add in the remaining whole wheat and all-purpose flour. Mix on medium speed until a soft ball is formed.

Knead the dough on a flour surface for 5 minutes or until smooth. Add flour as kneaded (i.e., if the dough is really stick, add a little bit of extra flour to your countertop and work it into the dough).

Put the dough in a oiled bowl, cover with a wet tea towel, and let rise in a warm place for 45-60 minutes. I placed my bowl on top of the stove. I find it's always pretty warm there.

Now, the dough should have doubled in size. Punch down the dough. Divide in half. Roll into two thick rectangles, then starting at the short end, roll up the dough and place each roll into a 9 x 5 inch greased bread pan.

Cover the two loaves with a wet tea towel and let rise for another 30 minutes (or until doubled) in a warm place.


Preheat oven to 350 degrees F. Once the two loaves are finished rising, bake for approximately 30 minutes. A trick to knowing when you're bread is done is to tap on it. If it sounds hollow, then it's ready to come out of the oven. Let cool on a wire rack before serving —that is, if you can wait. I couldn't. I had two thick slices —one with butter and the other with almond butter.


ps. I LOVE the smell of fresh bread. LOVE it.


Roasted Sweet Potato and Butternut Squash Soup


This afternoon, I tried a soup recipe from Two Peas & Their Pod: Roasted sweet potato and butternut squash. I adapted it slightly by doubling the recipe, adding extra spices including red pepper flakes, and topped it off with goat's cheese. Sooo good. I just finished eating two helpings of it. Dan was a big fan as well.

Here's what you'll need:

2 medium butternut squash, peeled, seeds removed, and chopped
2 large sweet potatoes, peeled and chopped
3 carrots, peeled and chopped
~1 tbsp + more for drizzling olive oil
2 onions, chopped
4 garlic cloves, chopped
4 cups low sodium vegetable broth
2 cups water
2 1/2 tsp cinnamon
3/4 tsp nutmeg
1/2 tsp red pepper flakes
salt and pepper

Preheat the oven to 400 degrees F. Line a baking sheet with aluminum foil and spread the chopped butternut squash, sweet potatoes, and carrots. Drizzle with olive oil and toss around to make sure all of the vegetables are coated. Let roast for 45-60 minutes, stirring every once in a while (every 10-15 minutes). Once the vegetables are roasted, remove from oven and set aside for a few minutes.

In a large stovetop pot over medium heat, add the olive oil, followed by the onion and garlic. Cook under tender, then add the roasted vegetables. Stir and let cook for 5 minutes. Add in the vegetable broth, water, cinnamon, nutmeg, and salt and pepper (I didn't use any salt). Let simmer for 20 minutes.

To puree the soup, use a hand held blender or transfer the soup to a bender in batches.

Return soup to stovetop pot and let simmer until you're ready to serve it. Add in red pepper flakes at this point. I find that the longer you let the soup simmer, the better the flavour.

Top the soup with a spoonful of goat's cheese. It melts right in and tastes oh so yummy! I also made homemade bread to go with it.


Thursday, November 1, 2012

Roasted Pumpkin Seeds


It's HALLOWEEN. Candy, chocolate, costumes, cute kids trick-or-treating, pumpkin carving, and of course, roasted pumpkin seeds.

I love roasted pumpkin seeds.

There are a number of way to roast them, but here's what I did.

What you'll need:

1 cup of pumpkin seeds
1 tbsp olive oil
1 tbsp balsamic vinegar (I used a little bit more because I love vinegar)
1 tsp minced or powdered garlic
1 tsp minced or dried rosemary
1 tsp minced or dried thyme
1 tsp salt

Rinse pumpkin seeds and let them dry out for an hour or so. Then mix the seeds in a bowl with all of the ingredients.

Preheat oven to 300 degrees F. Line a baking sheet with parchment paper. Spread seeds on the parchment paper and bake for 20-30 minutes or until they are a light gold colour. Make sure you shake or toss around the seeds every 5 or so minutes.

I also followed the same instructions as above, but used olive oil, 1 tbsp of brown sugar, 1.5 tsp of cinnamon, and a drizzle of honey. If you prefer sweet to salty, these are the pumpkin seeds that you should bake :)


Sunday, October 28, 2012

Pizza Crust


Homemade pizza, Moosehead's hockey, and World Series baseball equals a good Saturday night.

What you'll need:

2 1/4 tsp yeast
1 cup warm water
2 1/2 cup flour
1 tsp honey
1 tsp salt
2 tbsp olive oil
cornmeal

Preheat the oven to 400 degrees F. Line a round baking sheet or pizza stone with parchment paper. Sprinkle the paper with cornmeal. Set aside.

In a large bowl, combine the yeast and warm water (be sure that your water is not too hot or else you'll kill the yeast and dead yeast is no good!). Stir together until the yeast dissolves. Add the flour, honey, salt, and olive oil. Mix everything together with a wooden spoon, then use your hands to form a ball. On a lightly floured surface, knead the dough for a few minutes until it is soft. Put the dough an oiled bowl (just coat the inside of a bowl with a little bit of olive oil), cover, and let rest for 10-15 minutes.


Form the ball of dough into a disc shape and stretch into your desired thickness (I did this by holding the dough in the air and rotating it —letting gravity stretch it). Place it on your prepared baking sheet or pizza stone.

Add your favourite toppings and bake for ~25 minutes. Slice and serve.


Homemade Oreo Cookies


With Halloween just around the corner, I thought some "festive" baking so in order. After searching foodgawker, I stumbled upon a recipe for Homemade Oreo Cookies by Smitten Kitchen. I thought they looked delicious and with a touch of green food colouring for the filling, they were perfect for Halloween. Dan agreed.


What you'll need for the Oreo Cookies:

1 1/4 cup AP Flour
1/2 cup unsweetened Dutch process cocoa
1 1/4 cup sugar
1 tsp baking soda
1/4 tsp baking powder
1/4 tsp salt
1/2 + 2 tbsp salted butter
1 egg


What you'll need for the Filling:

1/2 cup salted butter, at room temperature
1/4 cup vegetable shortening 
2 cups confectioners sugar
2 tsp vanilla extract

Preheat the oven to 375 F.

Line a baking sheet with parchment paper. 

In an electric mixer, combine the flour, cocoa powder, sugar, baking soda, baking powder, and salt. Mix on low speed for a couple of minutes until everything is well combined and there are no lumps. Add the butter, then the egg while continuing to mix on low speed. After a few minutes, you should have a ball of dough. It may be a bit crumbling, but it's moist, so when you form the cookie dough balls, it will all stick together. No worries!

Now, the original recipe said to make rounded teaspoons of batter —mine were a bit bigger than this (probably more like a tablespoon; however, be careful because the cookies do expand while baking). Place your balls of dough 2 inches apart on the parchment lined baking sheet. Flatten the balls slightly using you hands. I actually did this while I was forming the ball of dough. Instead of making "balls" of dough, I made "discs" of dough. Either way works just fine. 

Bake for ~9 minutes, then let cool on a wire rack. 


While you're patiently waiting for the cookies to cool (and/or have another batch in the oven), you can get started on the filling. Place the softened butter and vegetable shortening in a mixing bowl and mix at medium speed for a couple of minutes. Gradually add the confectioners sugar and vanilla. Mix on high speed for a couple of minutes. My filling was a bit dry, so I added a tbsp of milk. This softened the filling up quite nicely and made it a bit more fluffy. 

Now, have fun with it and add some colour to the filling. 


To assemble the Oreo Cookies, simply spread or pipe the filling onto one cookie then sandwich together with another cookie. Serve with a tall glass of milk!

This recipe made about 13 Oreo Cookies (but, like I said, mine were quite large).


Friday, October 26, 2012

French Chocolate Macaroons


So, I've always been curious about these french macaroon things. I've never actually ate one before. But, they look so darn pretty. I had to give them a try.

I got this recipe from David Lebovitz

What you'll need for the Macaroon Batter:

1 cup (100 grams) powdered sugar
1/2 cup powdered almonds (50 grams sliced almonds, pulverized)
3 tbsp (25 grams) unsweetened Dutch-process cocoa powder
2 large egg whites, at room temperature
5 tbsp (65 grams) granulated sugar

What you'll need for the Chocolate Filling:

1/2 cup heavy cream
2 tsp light corn syrup
4 ounces semisweet chocolate, finely chopped
1 tbsp butter, cut into small pieces

Preheat the oven to 350 F.

Line a baking sheet with parchment paper. Also, have a pastry bag with a plain tip (1/2 inch) ready. Unfortunately, I didn't have a pastry bag on hand, so I cut a 1/2 inch hole in a ziploc bag. As a result, my macaroons turned out a bit more "rough" looking than other peoples, but I had to make do with what I had. 

Using a blender or food processor, grind together the powdered sugar, almond powder, and cocoa powder until there are no lumps. This mixture needs to be very fine. I read a tip on another blog about sift the mixture a few times to increase smoothness.

Now, set the dry ingredients aside while you beat the egg whites. I used a handheld electric mixer. You need to beat the egg whites until they rise and hold their shape. Beat in the  sugar until the mixture is stiff and firm (about 2-3 minutes). You can check this by tipping your bowl upside-down —the mixture should be firm enough to stay in the bowl (see, I was able to tip the bowl upside-down and take a photo haha —don't be afraid to give it a try).


In two batches, use a spatula to fold the egg whites into the bowl containing the dry ingredients. When the mixture is smooth and appears to be mixed well, put the batter into the pastry bag or ziploc bag. 

Pipe the batter into one-inch circles on the parchment-lined baking sheet. Leave about a one-inch space in between macaroons. To flatten the macaroons, smack the baking sheet on the counter a few tops, then place in the oven to bake for ~15 minutes. Before removing the macaroons from the baking sheet, let them cool completely.

While you're waiting for the macaroons to cool, you can prepare the chocolate filling. To do this, heat the cream and corn syrup in a saucepan. As soon as this mixture begins to boil, remove from heat and add in the chopped chocolate. Stir until smooth, add in the pieces of butter, then stir again until smooth. Let the chocolate filling cool completely before assembling the cookies.

Now, for the fun part!! Once the macaroons and chocolate filling are both cool, you can assemble the cookies. To do this, you simply spread the chocolate filling on the inside of one macaroon then sandwich it together with another macaroon. Ta-da —all done. Now, enjoy them with a cup of tea :)


Thursday, July 5, 2012

Meringue Filled Coffee Cake


The weather here in Scotland is so dreary today that I'm not motivated to go to far from the flat. So, I thought, why not give another Daring Baker's challenge a go. After browsing through old challenges, I settled on one from March 2011: Meringue Coffee Cake. Basically I choose this recipe because I had all of the ingredients on hand and didn't have to go out to the grocery store haha And, this cake looks pretty. I like pretty baked goods.

Let's get started.

What you'll need: 

For the Coffee Cake Dough
1/2 cup all purpose flour
2 Tbsp sugar
1/2 tsp salt
1 1/8 tsp dried active yeast
2 Tbsp water (doesn't matter what temperature; I used cool water)
5 Tbsp whole milk
1/4 salted butter 
1 egg

For the Filling
1/2 cup chopped nuts (pecans, walnuts; I used hazelnuts)
1 Tbsp sugar
1/8 tsp ground cinnamon
1/2 cup chopped chocolate (I used semi-sweet)

For the Meringue
1 1/2 egg whites 
1/8 tsp salt
1/4 tsp vanilla
1/4 cup sugar

Egg Wash
1 beaten egg

In a large mixing bowl, combine 3/4 cup of the flour, the sugar, salt, and yeast, and stir with a wooden spoon. 


In a small saucepan, combine the milk, water, and butter over medium heat until warm and the butter is melted.


Now, using an electric mixer, gradually add the warm wet mixture to the dry mixture. Beat on low speed until well blended. Increase the mixer speed to medium and beat the mixture for another 2 minutes. 

Add the eggs and 1/2 cup of the flour. Beat the mixture on medium speed for 2 more minutes.


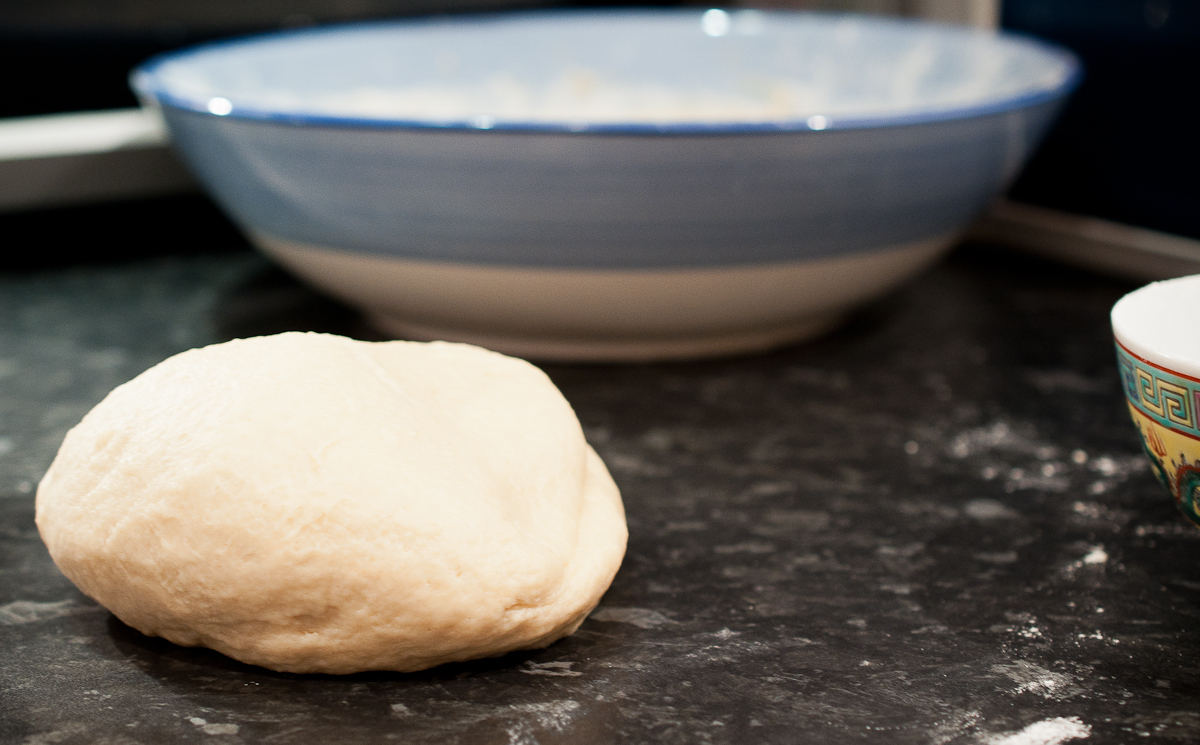
Now, use a wooden spoon to stir in the remaining flour (3/4 cup). I kept adding flour gradually. It should form a dough that holds together and is no longer sticky. Put the dough onto a floured surface and knead with your hands for 8-10 minutes. Add additional flour as needed. Eventually your dough should be soft and smooth. 


Lightly grease a bowl with oil (I used olive oil). Place the ball of dough into the bowl and coat all sides with oil. Cover the bowl with saran-wrap and place a tea towel over the bowl. The original recipe said to let the dough rise for 45-60 minutes until the dough has doubled in size; however, it actually took my dough ~1 1/2 hours to double in size. 

While the dough is rising, you can prepare the filling. In a small bowl, combine the cinnamon and sugar. Measure out the nuts and chopped chocolate, and place in a separate bowl. Alternatively, you can mix everything together in one bowl, but I decided to put the sugar mixture and nuts/chocolate on separately. 

Once the dough has doubled in size, you can make the meringue. In a small mixing bowl, beat the egg whites and salt on low speed for 30 seconds, then increase to high speed and beat until the mixture is foamy and opaque. Add in the vanilla then gradually add in the sugar while continuing to beat the mixture. The meringue is done when stiff, glossy peaks have formed. 

Now, the fun part: assembling the coffee cake. Line a baking sheet with parchment paper 

On a lightly floured surface, roll out the dough into a 20 x 10 inch rectangle. Spread the meringue over the rectangle of dough so that it extends evenly across the dough (keep 1/2 inch from the edges clear of the meringue). Sprinkle the filling over the meringue. I alternated between the sugar mixture and the nut/chocolate mixture.


Once you have spread the meringue and filling onto the dough, roll up the dough into a log. Start from one of the long sides. Pinch the seam to closed to seal. Place the log of dough on a baking sheet lined with parchment paper. The seam should be facing down. Seal the two ends of the log together so that it forms a ring. I found that it worked good when I tucked one end into the other and then lightly pinch the dough together so that it was sealed. 

Use a knife or kitchen scissors to make cuts along the outside edge of the dough ring. These cuts should occur at ~1 inch intervals.


Cover the coffee cake with saran-wrap and allow it to rise again for 45-60 minutes. 

Preheat the oven to 350 F. Beat the egg with a splash of cream (if you have it on hand), and brush onto the coffee cake. Bake for 25-30 minutes until the coffee cake is risen and golden brown. Cool the coffee cake on a wire rack. If you like, you can dust the coffee cake with icing sugar and/or cocoa powder.


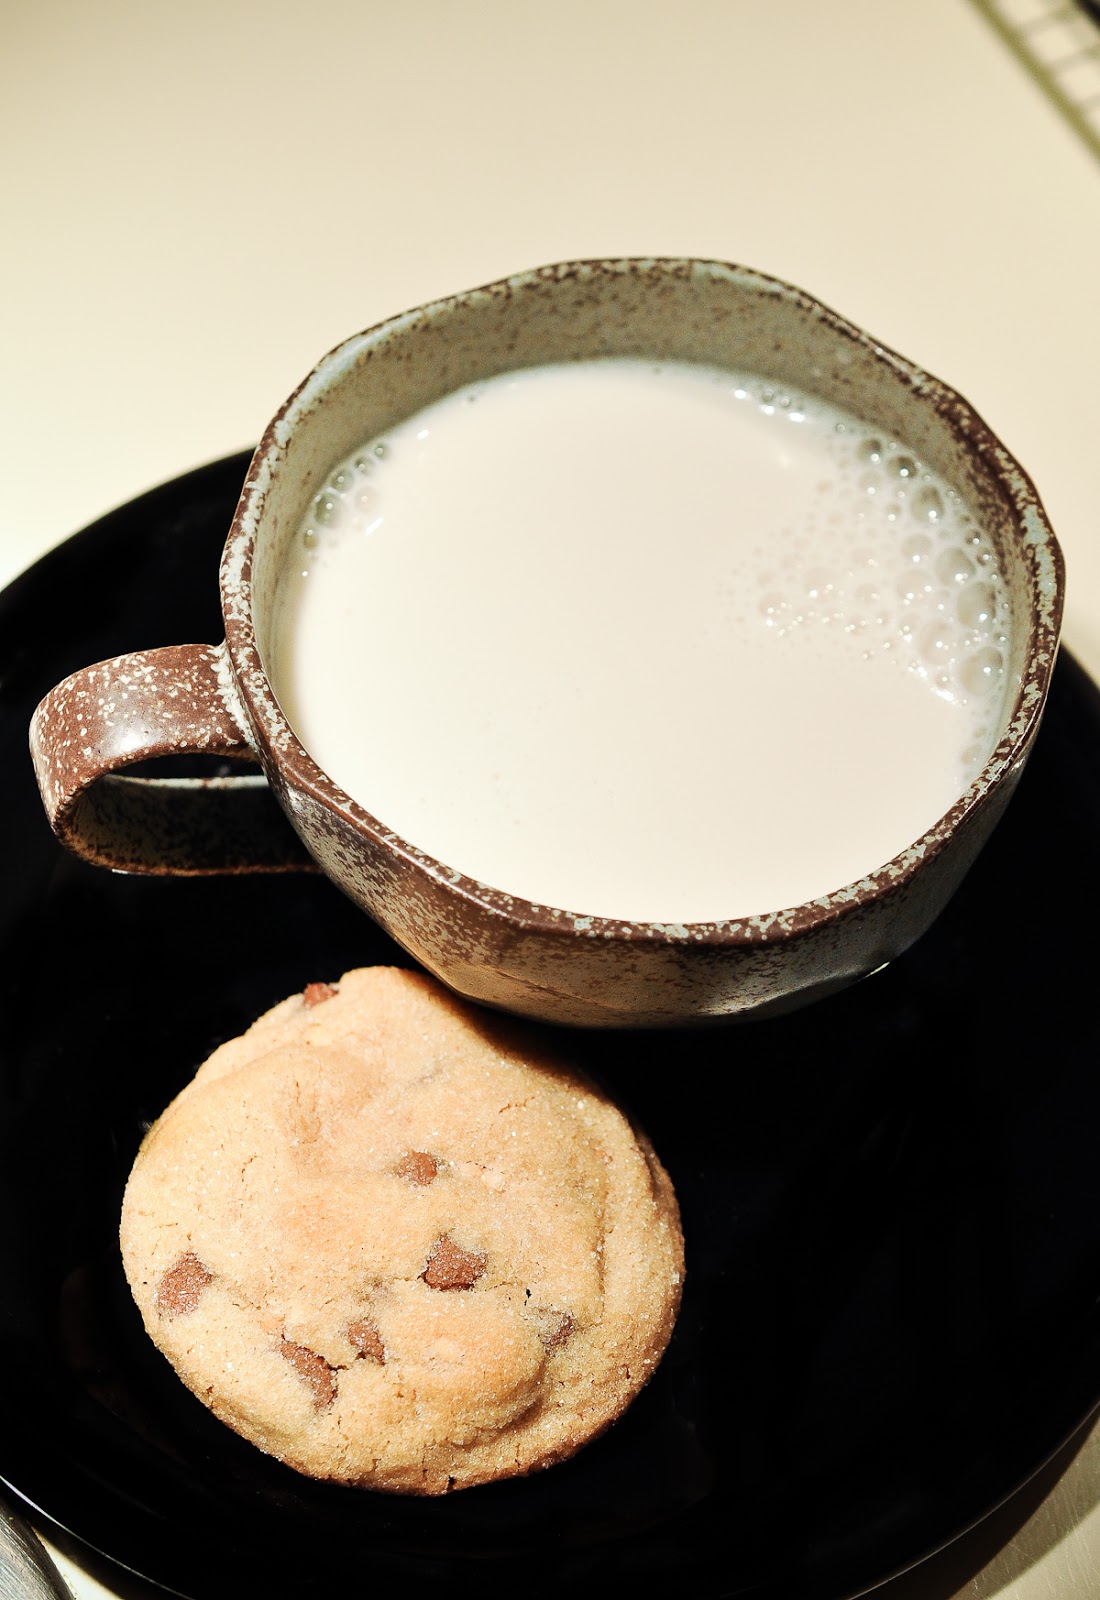
Enjoy warm —I had two warm slices and they were delicious :)